

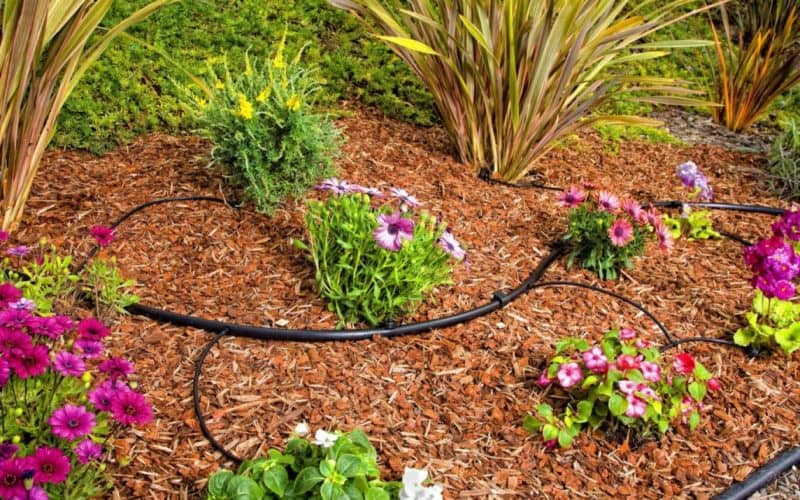
Why Drip, Not Sprinklers, for Garden Beds
Overhead sprinklers work well for turf. They work poorly for vegetable gardens, raised beds, and mixed borders — for three specific reasons:
Drip System Components
A drip system has fewer parts than an in-ground sprinkler system, and all of it installs above-ground or just below the soil surface.
The supply chain (from hose bibb to plant)
Optional components
- In-line drip tape: For row crops, drip tape (a flat tube with pre-installed emitters every 6–12 inches) is faster to install than individual emitters on stakes
- Soaker hose: Even simpler than drip tape, but less uniform output
- Pressure-compensating emitters: Maintain constant output regardless of pressure variation — worth using on sloped beds
Emitter Selection by Plant Type
| Plant type | Recommended emitter | Notes |
|---|---|---|
| Tomatoes, peppers, aubergine | 1–2 GPH emitter per plant | High water need; deep root zone |
| Courgette, cucumber, squash | 2 GPH emitter per plant | Large plants, high demand |
| Lettuce, spinach, herbs | 0.5 GPH per plant or drip tape | Shallow roots; frequent light water |
| Raised bed (mixed planting) | 1 GPH per 1–2 sq ft | Area-based calculation for mixed beds |
| Fruit trees | 2–4 GPH, multiple emitters per tree | Apply at drip line, not trunk |
| Shrubs and perennials | 1 GPH per plant | Adjust for mature size |
| Containers | 0.5–1 GPH per container | Containers need more frequent water than beds |
Designing Your Layout
Step 1: Map the beds
Sketch your beds and mark plant locations. Group plants with similar water needs in the same zone — tomatoes and peppers can share a zone; lettuce and herbs should be on a separate zone (they need less water and more frequent light applications).
Step 2: Calculate flow rate
Add up the GPH output of all emitters in each zone:
- 6 tomato plants × 2 GPH = 12 GPH
- 12 lettuce plants × 0.5 GPH = 6 GPH
- 4 courgette × 2 GPH = 8 GPH
Drip zones have very low flow demands — most drip zones run at 0.2–1.0 GPM, far below a sprinkler zone's 3–6 GPM. This means you can run multiple drip zones from a single controller output if you install a manifold.
Step 3: Run times
How long should each drip zone run? Target: deliver 1–1.5 inches of water per week to the root zone (adjust by plant type using the table above).
Simple calculation: If your tomato zone has 6 plants × 2 GPH = 12 GPH, and each plant needs approximately 1–2 gallons per day:- 6 plants × 1.5 gallons = 9 gallons per day
- 12 GPH system = 0.75 hours (45 minutes) daily run time
What is the best sprinkler for a vegetable garden?
For established vegetables planted in rows or beds, dripline or individual emitters are usually a better starting point than an overhead lawn sprinkler. They place water at the root zone, keep paths drier and allow the garden to run on a schedule separate from turf. Overhead watering can still help establish a freshly seeded bed, but it should not become the default merely because one sprinkler covers the whole plot.
| Garden layout | Practical starting point |
|---|---|
| Straight vegetable rows | Dripline with emitter spacing matched to soil and crop spacing |
| Widely spaced tomatoes, peppers or squash | Individual pressure-compensating emitters, often more than one for mature plants |
| Dense salad greens or seedbeds | Closely spaced dripline; temporary gentle overhead watering when needed for establishment |
| Raised beds | One independently flushed loop or parallel line set per bed |
| Mixed flowers and vegetables | Separate lines or valves when root depth and watering frequency differ |
Installation: Step by Step
Tools needed
- Tubing cutter or sharp scissors
- Hole punch (for inserting barb fittings)
- Stakes (for holding tubing in place)
- Teflon tape (for threaded connections)
Step 1: Connect to water supply
Connect the pressure regulator and filter to the hose bibb (or to your irrigation system zone valve). Hand-tighten plus a quarter turn — don't overtighten plastic fittings.
Step 2: Lay mainline tubing
Run 1/2" mainline from the supply connection along the length of each bed. Leave tubing a few inches past the end of each bed — you'll cut and cap it after emitter installation.
Securing mainline: Use 6-inch ground stakes every 2–3 feet. The tubing will become more flexible when warm — install on a warm day or run hot water through it to soften before shaping around corners.Step 3: Install emitters and micro-tubing
Using the hole punch, create a hole in the mainline at each emitter location. Insert a barb fitting, connect a 6–18 inch section of 1/4" micro-tubing, and attach the emitter or stake assembly at the plant end.
Placement: Position emitters 2–4 inches from the plant stem (not at the stem — drip irrigation directly on stems promotes rot). For large plants, use two emitters on opposite sides.Step 4: Cap the ends
Fold the end of each mainline run and secure with a figure-8 closure, or use an end cap with a small removable plug for periodic flushing.
Step 5: Run and check
Turn on the zone and walk every emitter. Check:
- Each emitter is dripping (not spraying or absent)
- No mainline connections are leaking
- Water is reaching the root zone, not pooling on the surface
Step 6: Mulch over
After verifying the system works, apply 2–3 inches of mulch over the tubing and emitters. Mulch:
- Reduces evaporation from the soil surface
- Keeps drip tubing from UV degradation
- Reduces weed pressure further
Connecting to a Smart Controller
Drip systems connect to a standard irrigation controller zone valve — the same 24V AC valve used for sprinkler zones. The controller treats a drip zone identically to a sprinkler zone.
With a Rachio 3: Configure the zone as "drip" type. Set your plant type (annual vegetables, perennials, trees/shrubs) and soil type. The Rachio 3 will calculate ET-based watering schedules specifically for drip — typically shorter, more frequent runs than a turf zone. Run time guidance for smart controllers:- Most drip zones: 30–90 minutes per run
- Frequency: Daily or every other day in summer; every 2–3 days in cooler seasons
Maintenance: What Drip Systems Need
Drip systems are lower maintenance than sprinkler systems but not zero maintenance.
Spring startup:- Inspect all emitters — clogged emitters are the most common failure (flush with a pin if blocked)
- Check all connections for leaks — winter frost expansion sometimes loosens barb fittings
- Replace any UV-degraded micro-tubing (looks cracked or brittle)
- Flush mainline runs monthly (remove end caps, run the zone for 60 seconds)
- Check emitter output every 4–6 weeks (a closed-off emitter leaves a visibly dry soil patch)
- In Zones 1–7: Disconnect and drain the system before first frost. Poly tubing is not rated for freeze-thaw cycles under pressure.
- Blow out with compressed air if any sections cannot fully drain by gravity
- Store emitters and 1/4" tubing indoors — UV degradation is cumulative; storing over winter extends life significantly
Related guides:
- Lawn Watering Guide →
- Best Smart Irrigation Controllers →
- How to Winterize Your Sprinkler System →
- USDA Zone Guide →